Guides › FinishBox

How to use FinishBox
FinishBox edits whole shoots fast. There is no catalog and no import: open a folder of culled photos, let Auto do the routine work, fix the few that need a hand, and export everything in one pass.
Read the complete FinishBox User Guide (every tool, step by step) →
1Install, try it free, and enter your key
- Click Download free 14-day trial on the FinishBox page and run FinishBox-Setup. It installs for your user only: no admin password and no Windows prompt. Windows 10 and 11 (64-bit).
- Every feature works for 14 days with no account and no credit card. After that you can still open, browse and edit photos, and every edit is kept; Export, Photo Merge and Open in Another Editor ask for a license key.
- When you buy, your license key is shown right after payment, emailed to you and kept in your account. In FinishBox open Help → License…, paste the whole block from -----BEGIN to END----- (or open the .key file) and click Activate. The PC needs the internet that first time; one license covers 3 of your PCs, and Remove License in the app (or My software on this site) frees a PC. After that it works offline and never expires.
2Open a folder
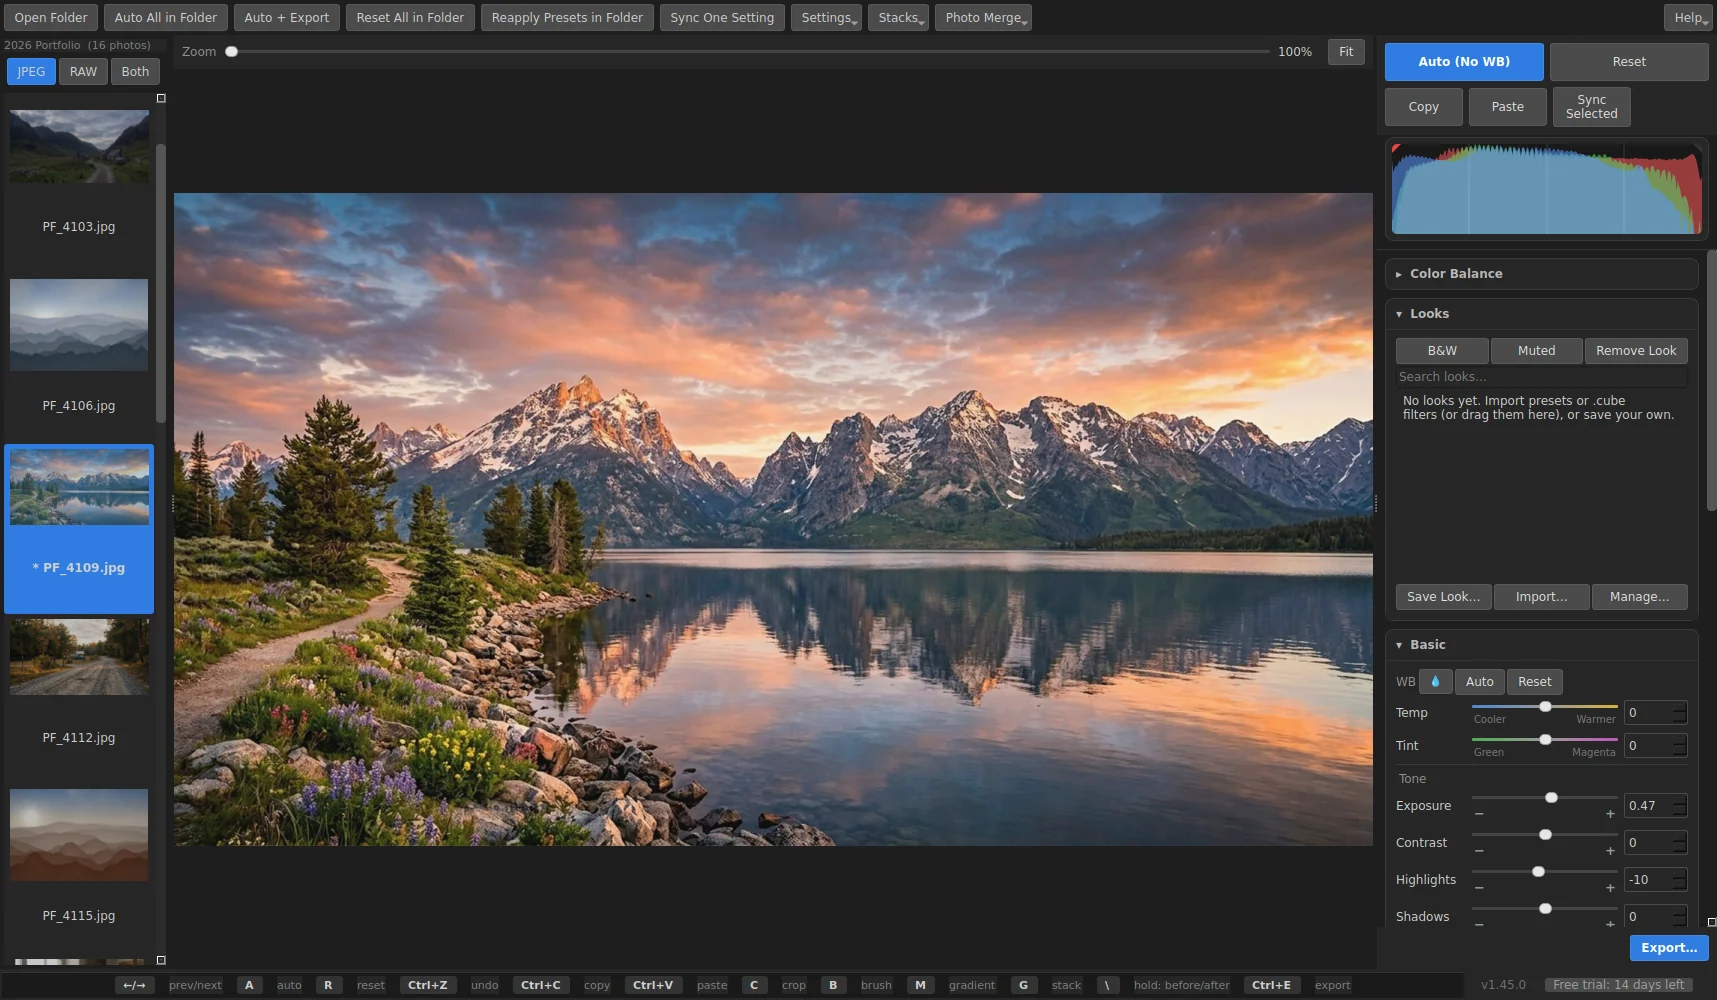
- Click Open Folder and pick a folder of culled photos (JPEG, RAW or both). Thumbnails appear down the left.
- Move between photos with the ← and → keys or by clicking a thumbnail. Your edits save automatically, beside the photos; the originals are never changed.
- Bursts are grouped into stacks automatically (by capture time, or every 5 photos).
3Edit a photo
- Press A (or click Auto) for a light tune-up of exposure, white balance and tone.
- Fine-tune with the sliders: Temp and Tint, Exposure, Contrast, Highlights, Shadows, Whites, Blacks, then Presence, the tone curve and the color mixer.
- Click Subject, Sky or Background for an AI mask, or use the brush and gradients for local fixes; Light the Face lifts every subject's face.
- Try a Look, or drag a downloaded preset or .cube filter .zip onto FinishBox to add it.
- Hold \ to see the before and after. Press R to reset, Ctrl+Z to undo, C to crop.
4Edit a whole shoot
- Auto All in Folder runs Auto on every photo; Auto Tone Strength sets how strong it is, with per-setting limits and offsets.
- Copy (Ctrl+C) one photo's settings and Paste (Ctrl+V) them onto a selection, or Sync One Setting across the folder.
- Fix one frame of a stack and give the whole stack the same look.
- Camera/Lens Presets apply automatically when several photographers shoot the same event.

5Export
- Press Ctrl+E or click Export, choose the folder, the size and the quality. Tick several outputs to write them all in one pass.
- Auto + Export does a whole folder in one go.
- Logo Settings adds your watermark on export. Captions, keywords and bib numbers are kept.
Keyboard shortcuts
| ← / → | Previous / next photo |
| A | Auto |
| R | Reset |
| Ctrl+Z | Undo |
| Ctrl+C / Ctrl+V | Copy / paste settings |
| C | Crop |
| \ (hold) | Before / after |
| Ctrl+E | Export |
| F1 | User Guide |
Questions
Does it edit RAW files?
Yes, RAW files from nearly every camera as well as JPEG. They open looking like the camera's own JPEG, with the extra room RAW gives.
Are my originals changed?
Only if you choose to export over them, and then a backup is kept. By default, exports go to a separate folder.
Do the AI features upload my photos?
No. The AI masks, Light the Face and AI Denoise run on your own computer.
Still stuck? Send us a message and the person who wrote the software will get back to you.